

Last updated on 20th September 2023
YouTube is the second most visited website in the world and is a major player in the video content market. With this platform, brands can engage consumers, create value-adding content, promote their products, and build brand recognition. For those who are new to video marketing, creating YouTube videos might seem daunting. Alternatively, if you’ve tried before, you might simply be seeking ways to improve your own YouTube video performance. In either case, you’re in the right place!
This post is packed with tricks that will help you make the most of your new video from start to finish – from research to equipment to optimisation.
How to make a YouTube video: our top tips
Making your own YouTube videos – and making them great – isn’t just about the content in the video itself. Video marketing and production involves plenty of other important components that can help you reach your video goals. We’ve compiled our top tips for how to research and plan your video, what kind of equipment to use, how to structure your video, and how to optimise and upload it to the platform in a matter of minutes.
Research and planning tips

1. Perform competitor research
The best place to start as you learn how to make a YouTube video is with a little competitive research. Take a look at how your competitors are using video content in their marketing strategy, and use them as a source of inspiration as you create content. You can also find their content gaps and fill them with your own video content; for example, if you notice your biggest competitor doesn’t have video FAQs, that can be a great way to stand out and add value for your potential customers.
To get started, create a list of your competitors, and then review their YouTube channels. Take a look at which of their videos have the most views and comments to see what your target audience is engaging with. As you review them, see if there are themes you can learn from – patterns that unite the most popular videos, topics that don’t get a lot of traction, and so on. This process will help you understand what resonates with your audience before you invest resources into creating your own content. You’ll end this process with a list of YouTube video ideas and can then work to prioritise them.
2. Perform keyword research
YouTube keyword research is an SEO tactic you can use to find the best search terms to include in your video content. Simply adding intentional, researched search terms to your video title and meta description can drastically improve your video’s performance.
You can start by making some assumptions about what your audience is searching for. For example, a decking company might already know people will search for “DIY deck repair” or “how to restain a deck.” Do a bit of research on your own by searching for these terms on YouTube. If you see videos from your competitors, you know you’re on the right track. As you review them, see if they have a lot of views, are high quality, and answer the question appropriately. This will help you see where there are opportunities to create better content that could rank higher in user searches. You can perform more sophisticated keyword research using an online keyword tool; we’ve compiled our favourites in our post The 9 Best YouTube Keyword Tools.
As you incorporate your search terms, consider including a written copy of your video transcript in the description to maximise your possibility of showing up in search results. For more on YouTube SEO, check out our post Video SEO: The Ultimate Guide.
3. Create a cohesive tone
There’s a reason why movies are categorised into genres. Imagine this: you’re watching a horror movie, and you’re on the edge of your seat in anticipation of the next blood-curdling moment. But just as you expect a dramatic, terrifying scene to unfold, the movie takes a comedic turn. Suddenly you’re watching two characters exchange quippy dialogue, and the thrill is totally lost. Talk about a mood killer. The same thing can happen in marketing videos.
As you consider your video, think about the overall mood of the piece you’re creating, and how all of the video’s elements – music, lighting, voice over, even the colour composition – come together to create that mood and reflect your brand. Be sure the tone of your video is consistent throughout and reflective of your overall goal. You can start this process by simply brainstorming a list of words to guide your process; you might want to create a video that’s motivational and inspiring, one that’s serious and tear-jerking, or one that’s high-octane and fast-paced. Whatever direction you choose to go, establish that before you collect footage so your video reflects the mood you’re trying to create.
4. Scout a location
If you’re filming on location, for example at your office or home, location scouting can be a pretty easy task. Simply set up your camera in various places to find the best physical spot for your shoot; as you preview options, consider what’s in the background of the shot and the lighting to find the optimal location – but more on that later.
If you’re shooting off-site, allow yourself plenty of time to find the right location. Consider whether you need access to electricity depending on your equipment setup, how the natural light affects the shot at that time of day, and how crowded the location is. Be sure to scout on the day of the week and time of day you plan to shoot to collect enough data on your location. For example, if you’re filming outdoors at a local park, you may want to plan your video shoot during school hours so you have the place to yourself. Finally, some locations require permits to collect footage, so be sure to do your research and ask for permission if you’re using someone else’s business or a public facility.
5. Write a script and create a storyboard
The last thing you want to do is show up on location with no idea of how the end video should look. Overcome this avoidable problem before you capture your footage by taking time to create a script and a storyboard. Begin by writing your script. Your script might include on-camera dialogue that actors say, or voiceover that’s layered on top of footage in post-production. Either way, keep your script simple, and keep your sentences short. When someone is reading text, they can go back and re-read it if a sentence is long or complex; however, when watching a video, viewers aren’t likely to rewind a video to listen again. You get one shot to make a lasting impression, so be sure your message is simple, concise, and clear.
Next, take your script a step further as you create a storyboard. A storyboard is like a comic-book-style overview of your video. It shows how different shots come together to tell a single visual story. You can create a storyboard using software like Storyboarder, or you can simply sketch out your ideas. You don’t need to invest a lot of time and resources into this process; the goal is to have a high-level overview of the content and flow of your video so you can produce it well and tell a cohesive story.
Both storyboarding and script writing should take place before you start collecting footage so your team has a shared vision for the end result. If you need a little inspiration to get the process started, check out our post 21 YouTube Video Ideas for Businesses.
Equipment tips

6. Use equipment you already have
Making a YouTube video doesn’t have to be expensive. You can probably leverage hardware you already have to create videos. Most recent smartphones come with high-quality cameras that are perfect for shooting videos; you can even purchase an inexpensive tripod for your phone to ensure the shot is still. Depending on the type of video you’re creating, you can also use the webcam that’s built into your computer, or purchase an external web camera. This method is great for shooting things like webinars, testimonials, tutorials, and interviews.
If you find that neither of these options are giving you the video quality you’re looking for, you can either purchase equipment of your own, rent equipment from a video hardware rental company, or work with a video production partner. The right choice for you will depend largely on your timeline, your budget, and how much content you plan to create ongoing. For example, if you’re going to create a weekly vlog, it may be time to invest in equipment you can keep at the office. But if your video is for a one-off campaign, it could be worth hiring experts rather than investing in equipment you likely won’t continue to use.
7. Test your audio
Nothing makes a video feel like an amateur production more than poor-quality audio. If you’re going to use your camera on your phone or computer, be sure to run an audio test. Having clear audio is critical to your video feeling professional and polished, and getting quality audio isn’t a huge obstacle. First, test your audio on the camera you’re using to film your video and in the environment you’re going to film it. This test will give you a sense of how close your actors or interviewees need to be to the camera, and whether there’s a lot of noise in the background. If your test shows that your audio quality needs some work, it might be worth investing in an external microphone to ensure your audio is clear and high quality.
Investing in the right music and sound effects is vitally important if you want to create a high quality video. Great music and sound effects will bring life to your videos. For this we recommend Epidemic Sound where you get unlimited music/sound effect downloads, to use in personal and commercial projects.
We’ve partnered with Epidemic Sound to get you 10% off for 12 months when you sign up here:
Get 10% off for 12 months >>
8. Test your lighting
Lighting is what sets high-quality and low-quality videos apart. Before you start shooting, do a few lighting tests. You can invest in quality lighting equipment if your budget allows, take a trip to your local hardware store for a down and dirty DIY lighting kit, or simply move existing lighting around to get the look you’re going for. Performing a lighting test before your shoot will help you eliminate any unanticipated surprises; for example, if you’re filming in a room with windows, you’ll want to be sure the natural light doesn’t create distracting shadows in the frame. If you’re shooting outdoors, shoot during the golden hour: the hour or two leading up to sunset. The softness of the natural light outside is perfect for capturing great footage at that time.
9. Download the right editing software
If you’re willing to watch a few tutorials and be patient throughout the process, you probably have all the skills you need to edit a YouTube video yourself – there are loads of free video editing tips and resources out there to help. Luckily there are plenty of free or affordable video editing platforms available, and you might already have one on your computer. If you’re using a Mac, your computer comes with iMovie pre-installed. This program covers the editing basics, allowing you to splice footage, add text overlays and effects, change audio levels, and more. There are also plenty of other options available for download on a Mac or PC, like well-known Adobe Premier Pro and Final Cut Pro X, and a couple of our other favourites, Filmora and Movavi. Before you select an option, compare features and read customer reviews to find the right software for your needs. You could also consider using a lightweight video editing app on your phone; for more on those options, check out our list of top video editing tools.
If editing isn’t in your wheelhouse, you could also hire an outside company or freelance video editor to edit your video for you. This process can be made even easier if you created a storyboard, because then the editor will have an idea of what the viewer should see on screen throughout the video.
Intro and outro tips

10. An attention-grabbing intro
How many times have you started a video only to close out of it in just a few seconds because it didn’t draw you in? Your audience is no different. Today’s video viewers are very particular; you have to grab their attention in the first five seconds if you want to keep them around, which makes your video intro extremely important.
Your video intro might be something you use at the beginning of every video to promote your brand. If you’ve ever watched a TED Talk, you’ll recognise their consistent, on-brand intro video clips:
But your intro could also be created specifically to give your viewers a preview at what’s to come. For example, to use our decking company situation, the intro might simply look like someone coming on camera to explain what’s going to happen in the video: “In just five minutes, I’m going to show you how to sand and stain your deck, and share some helpful tips along the way to ensure a quality finished product.” This gives the audience confidence that they’ve found the video they’re looking for, and keeps them engaged.
The right approach for your video intro will depend on what kind of video you’re creating and how often you create content. If you’re looking for some awesome tools to help you make your video intro, look no further; we’ve compiled a list of our favourite intro maker tools for you already.
11. A compelling video outro
Assuming your video intro did its job of captivating your audience, and your video content kept them intrigued to watch the rest of your video, you should use the outro to compel them to take action. Your outro could include a call to action to visit your website, subscribe to your channel, watch additional videos, contact your team, or more. Either way, be sure not to leave your viewers hanging at the end, wondering what to do next. Instead, make their next steps very clear in your outro. Also be sure your other elements – visuals, music, voice overs, and more – come to a graceful close so you don’t create a jarring end experience for your viewers. For a little inspiration, check out this quirky video outro from Adobe Creative Cloud:
Video uploading and optimisation tips

12. Upload your video in minutes
YouTube makes uploading videos incredibly simple, and you can upload videos in just a few minutes. To get started, simply navigate to the Video Manager, available from your channel’s page (if you don’t know how to make a YouTube channel, don’t worry – we’ve created a step-by-step guide for you). Here’s a quick rundown of how to upload your first YouTube video:
- Set up your channel: You might have a channel already, but if you don’t you’ll want to create a YouTube account and then create a channel for your brand. This is the first step in uploading a video; you can’t upload a video if you don’t first create a channel.
- Customise your channel: YouTube lets you choose the name of your channel and upload profile images, just like you would on Facebook. We highly recommend this as it creates a branded, polished experience. Your profile is also a great place to write content that contains your keywords to boost your SEO.
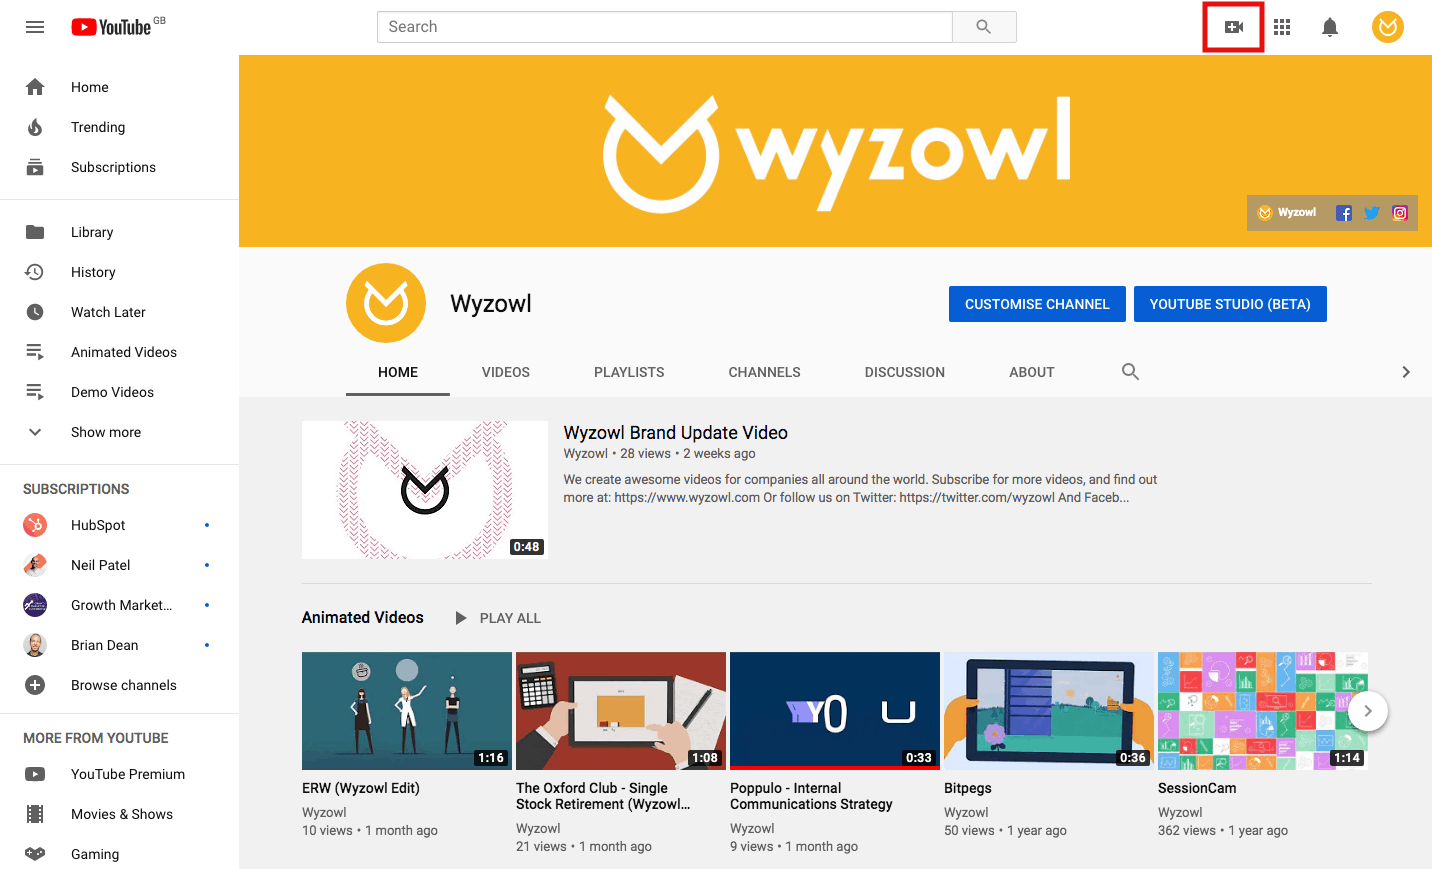
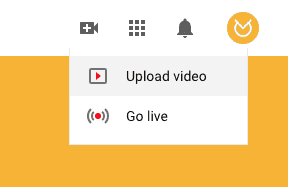
- Upload your video: This is easy. Simply navigate to your channel and click on the video icon in the top right corner, then click “Upload video”. From there, you’ll be asked to upload or drag and drop your chosen video file from your computer. As long as you have a reliable internet connection, this process should take less than a few minutes.

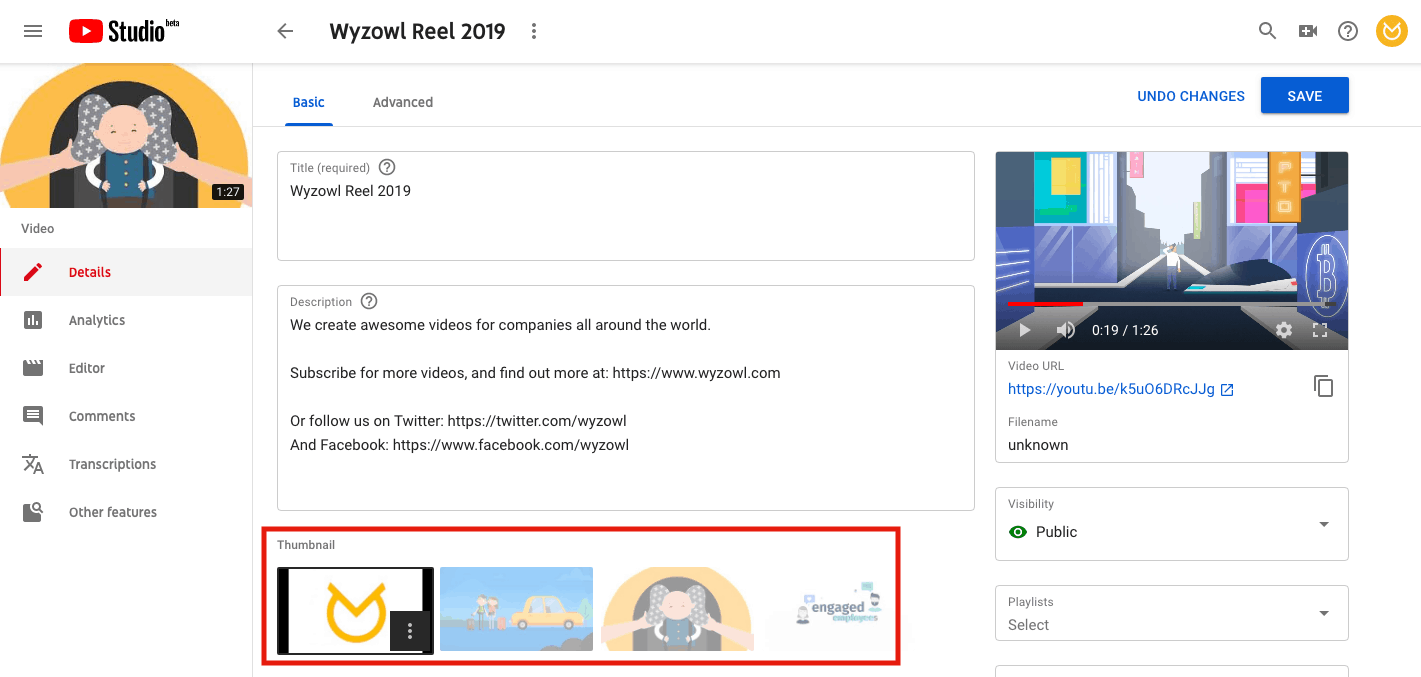
13. Optimise your video’s data
Remember back in the planning section when we discussed keyword research? This is where it comes into play. While your video is uploading, you can input critical video data, like your title, description, and tags, to optimise your video and improve your SEO. Here are a few tips to make the most of your video data:
- Pack a punch with your title: This is the first impression viewers will get of your video in their search results, so your video title needs to be clear and compelling. For example, a video titled “How to change the oil in your car in 15 minutes” is simple and easy to understand; viewers know exactly what they’re going to get. On the flip side, a video called “Oil change” is vague and doesn’t tell viewers exactly what to expect.
- Use keywords in your description: Remember when you did keyword research earlier? That’s going to come in handy now. Be sure to incorporate your keywords wherever you can to improve your search ranking, but specifically in your title and your video description. If you’re looking to learn more about improving your YouTube search performance, take a look at our blog on 13 ways to rank higher on YouTube.
- Use tags: YouTube tags are a no-brainer way to improve your video’s searchability. You can use multiple variations of the same idea to ensure maximum impact, like “changing car oil” and “how to change the oil in a car” and “DIY oil change.” You should leverage the keyword research you did earlier to get this process started.
14. Select an eye-catching thumbnail
While the written portion of your YouTube data is important to optimisation, selecting the right visual – a.k.a. the video thumbnail – is also important. Your thumbnail is the only image associated with your video in search results, so it’s got to stand out in the crowd. YouTube will automatically select a thumbnail for you, but it probably isn’t the most compelling image you could use from your video. Instead, select a custom thumbnail that will earn the attention your video deserves. Here are a few of our favourite tips:
- Choose a thumbnail with bright and engaging colours that will stand out on the search results page.
- Select a thumbnail with text on the screen to reinforce your video’s title; sometimes viewers don’t read the video title as they’re scrolling through search results, so putting the title on your thumbnail helps ensure they see your video.
- Format your thumbnail according to YouTube’s standards; the last thing you want is a thumbnail that’s too big, too small, or blurry. Check out our post on YouTube thumbnail sizes and best practices to get your process started.
15. Promote your video on other digital channels
Just because your video is live doesn’t mean your work is over. Now you have the task of promoting your video on other channels; while YouTube will do some of that work for you (as long as you’ve done your SEO homework and appear in the search results), you can still do some outbound marketing to extend your reach. Consider these tips as you share your video:
- Share your video on social: You already have audiences on Facebook, Instagram, Twitter, and other social platforms. Post your video to your existing followers and ask them to share your content as well.
- Post your video on your website: Your video might fit into your website on a home or product page, or you could consider writing a blog post about your video topic to give it a place to live.
- Send your video via email: Could your video be a marketing tool for your sales team? Do you already have a list of qualified customers? Consider how your video could support your existing email marketing strategy.
16. Keep an eye on your analytics
YouTube has sophisticated built-in analytics that make it easy for you to see how your video is performing. Just like Google Analytics on your website, YouTube Analytics lets you track:
- Total views
- Watch time
- Audience retention
- Traffic source
- Viewer age
- Viewer gender
- Geography
- Impressions
- Click-through rates
- So much more!
You can use this data to inform your content strategy moving forward. What videos are people engaging with the most? How can you create more content like those videos to improve your overall video strategy? Is there one video that’s so popular you want to run a paid ad campaign to get even more traction? These metrics can help you make informed decisions about your content plan moving forward.
Wrapping up
Uploading your first video to YouTube is just the start! Over time, by repeating this process, you can end up with a channel jam-packed with high quality YouTube videos that can engage and captivate your audience.
As you set out to amplify your YouTube presence, why limit yourself to just a video? After all, YouTube reaches more 18-49 year-olds than any TV network, so it’s in your best interest to leverage all of its features to reach and impress your audience – including YouTube channels and playlists. We have all sorts of content to help you with this, including how to create a YouTube channel, how to make a YouTube playlist and a YouTube header dimensions guide.